Easy Peasy Knitted Vests # 3 and # 4 and a Miniature Spinning Wheel!

After knitting my first two Easy Peasy Knitted Vests I’m on a roll and have produced two more! I just love this free Ravelry knitting pattern which is called Keep Me Warm Vest. It’s so easy and adaptable too. Vest # 3 is my apricot vest…

Vest Apricot 01

It’s knitted in Patons Caressa 8ply which is now discontinued. I bought a stack of this yarn on Ebay a year or so ago and have finally used some of it. I’m trying to do a bit of stash busting and am gradually making some miniscule steps to reducing my stash by .0005% 🙂

Vest Apricot 02

This yarn is a 45% wool / 45% acrylic / 10% mohair blend. I used size 4.5mm circular needles for the band and 6mm needles for the main body. Like my other two easy peasy vests, it only took about a week to knit…..that’s just knitting at night time after work.

Vest Apricot 03

With # 4 easy peasy vest I got a bit daring and added a cable strip for a bit of texture. I thought I had calculated it so that the cable strip would be central but alas it isn’t. However, I’m quite pleased with the effect anyway! What do you think? Sometimes a mistake in knitting can look okay!

Vest Forest 01

I call this my Forest vest…

Vest Forest 03

This vest is knitted in Cleckheaton Country Naturals 8ply which is a 100% wool. I used size 5mm circulars on the band and 6mm circulars on the main body. As you can see from all my easy peasy vests, I am just guessing what size needles to use with the wool and so far so good….they all fit me! I must say they are perfect for office work wear. I’ve worn them all to work every week with a long sleeved shirt and skirt and they are soooo comfortable.

And now for something completely different, here’s a miniature spinning wheel that I picked up on Ebay recently for $15. It’s so cute….I’ve never seen anything like it before.

Miniature Spinning Wheel 01

It stands only 25 cms tall and is 6 cms wide at its base.

Miniature Spinning Wheel 02

Miniature Spinning Wheel 03

The treadle goes up and down and both the wheel and bobbin rotate.

Miniature Spinning Wheel 04

Miniature Spinning Wheel 05

Has anyone ever seen such a tiny spinning wheel before?

I spent the weekend finishing my 5th easy peasy vest and another cowl….I’ll blog about them very soon. I also gathered a few projects together to take on holidays with me. I’m having a relaxing two weeks at Noosavile where I’ll spend a lot of time knitting on the river bank, drinking coffee, eating, shopping, visiting markets, riding my bike (yes, I take my bike with me and cycle around a bit) and catching up with a dear friend of mine and generally recharging my batteries. I hope to publish a few posts from Noosaville to show you what I’m up to. Hope you had a fabulous weekend full of crafty and fibre goodness.

Until next time…

Melanie

My Boy’s Beanie

I found this pattern in the latest (Winter) edition of Creative Knitting Magazine which is an Australian publication. I love cable beanies and this one is no exception. I made myself one not long ago using another very easy pattern. Unfortunately, the photos aren’t very clear and don’t give you a great picture of the cables. This is due in part to my son who hates having his photo taken and gets impatient so I had to quickly snap a couple of pictures rather than take the hundreds like I normally do and then eliminate any ones that aren’t up to my exacting standard 🙂

Beanie 01

Beanie 02

I used three balls of Cleckheaton Country Tartan 8ply which I had left over from a previous project. It’s an ideal colour for my son as he’s an outdoor worker and I can envisage this beanie getting pretty dirty!

Beanie 03

I have given him strict instructions on how to hand wash this beanie as it’s wool. The last one I made him was thrown into the washing machine and he wondered why it shrunk and felted!!!

Beanie 04

It took me about a week to knit doing a little bit everyday. I used size 4mm dpns (x5). I wanted to finish it quickly as this last week in Brisbane has been quite cool and the ideal time for my boy to wear a beanie to work.

Beanie 05

Yesterday I met with the Redland Spinners and Weavers at their bi-monthly Knit and Knatter meet up at The Artist Tree cafe. It was the largest gathering since the group started and was so much fun. Met Rona, another member of the group whose knowledge of spinning and spinners is mind boggling. I love these get togethers where we can chat, swap ideas, get help and generally check out what everyone else is spinning, knitting or everyone’s latest fibre acquisitions!

I’ll miss the next Knit and Knatter as I’ll be on holidays at Noosaville where I hope to be blogging lots about the Noosa area and the yarnie projects I’ll be taking with me to complete plus new ones to start. I have a Saraste Moebius kit I bought from Yarn Glorious Yarn last year which I haven’t started yet so I’ll pack my laptop and watch Cat Bordhi’s Youtube demonstration on how to cast on a moebius. This is a picture of the completed moebius…..I only hope mine will look like this too!

Saraste 01

Well that’s my weekend news. I’ve also just finished my fourth Easy Peasy Vest using the Keep Me Warm Vest pattern which I’ll blog about in my next post. Until next time…

Melanie

Redland Spinners and Weavers Open Day 2013

A beautiful sunny crisp winter’s morning dawned today for the Redland Spinners and Weavers Open Day in Cleveland. Ironically it is only around the corner from my home but because I can’t be trusted not to buy much I have to take my car and I am so glad I did because I had to offload my purchases on one occasion.

I arrived just before 10am to be greeted by a long line of enthusiastic fibre / spinning ‘junkies’ lining up to pay their $5 entrance fee (which included morning tea and lunch) and purchase raffle tickets. No cup of tea for me to start with; it was straight to the tables to offload the weight of those notes in my wallet!

The Gold Coast Spinners and Weavers’ table always has lots of goodies; this is where I spent a bit of money at last year’s open day.

Gold Coast Spinners

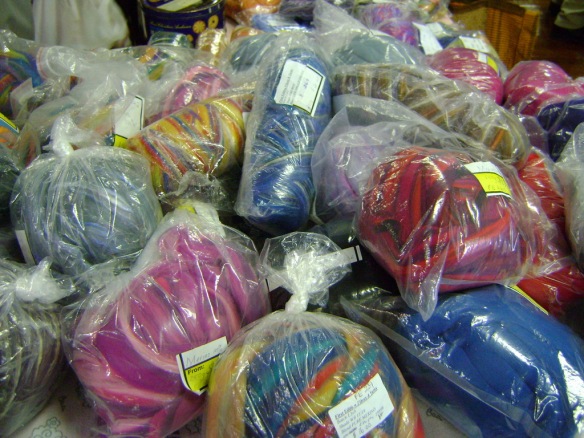
My eyes scanned the tables of fibre goodness and locked onto the following wool tops / rovings (never sure what they’re called).

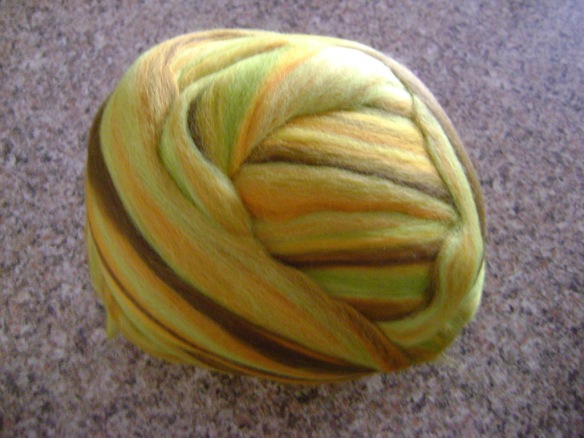
I bought three of these – a 100% merino – 250g each and cost $17 each.

Green Merino 250g

I bought one of these – a merino / 15% silk – 250g and cost $18.

Merino Silk 250g

And one of these – a merino / 20% alpaca / 20% silk – 250g and cost $21.20.

Merino Alpaca Silk 250g

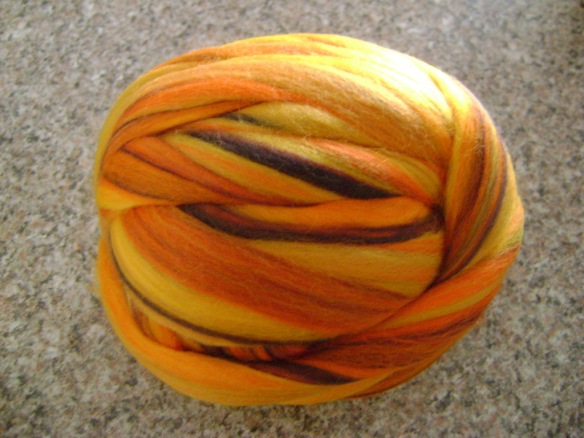
And one of these – a 100% merino – 250g that cost $17.

Orange Merino 250g 2

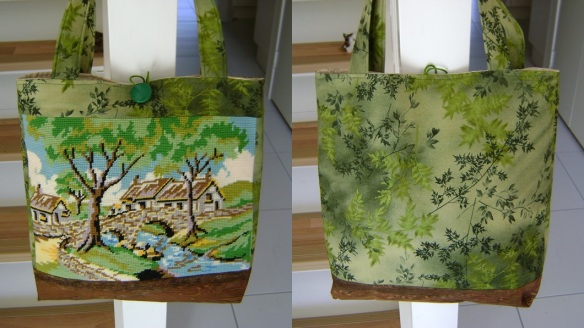
My visit to the Open Day would not be complete without visiting Desley’s stall where she sells exquisite machine embroidered goodies. I just love her tote bags which I use as knitting caddies. These totes are so adorable. This one has a tapestry front and a beautiful silk type of material on the back. The bags are sooooo well made and lined inside. They are a work of art.

Green Tote 1-tile

I just couldn’t resist this one….especially the saying on the back.

Blue Tote Front-tile

When I joined the Redland Spinners and Weavers Facebook page, I discovered VivianneK Handmade soaps as Vivianne was advertising she’d be at the Open Day. Mmmm I cannot resist handmade soaps and bought these little beauties.

VivianneK soaps

Two lemon myrtle, one rose and one violet and birch which is a soft blend of cedar leaf, musk and amber with notes of violet, clove bud, orchid and white birch. Aren’t they simply delicious!! They certainly smell delicious!

VivianneK soaps 2

Something else that grabbed my attention was an array of shawl pins on Lindy’s stall. How many times have I been after a pin to tie a shawl or the front of a wrap to stop the wind from blowing it off. They were so cute I had to buy two!

Scarf Pins

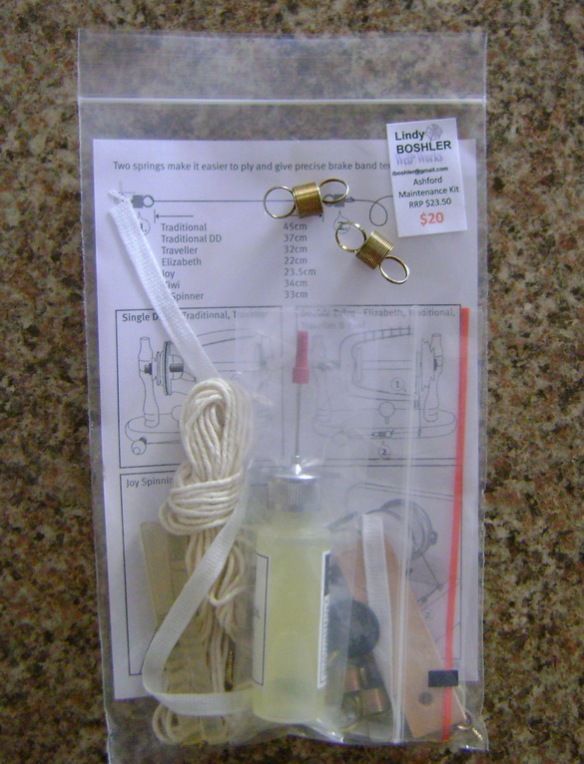
And because Lindy is an Ashford distributor here in Brisbane I took the opportunity and purchased an Ashford Maintenance Kit and a couple of extra tension springs for my spinning wheels.

Ashford Mtce Kit

After that mammoth shopping spree I grabbed a cup of tea and some lovely cakes, sat down and got out my knitting. Yes, I knew I’d be able to slip in a few rounds of the beanie I am knitting my son. I have to finish it soon as this week is the coldest we’ve had this winter and I don’t want to finish it just as the cooler weather finishes. As I sat there women came and sat with me, drinking tea and chatting and moving on to be followed by others. It was just so much fun relaxing and chatting whilst knitting and observing everyone else. Beats going to work any day. Unfortunately, that’s where I’ll be tomorrow.

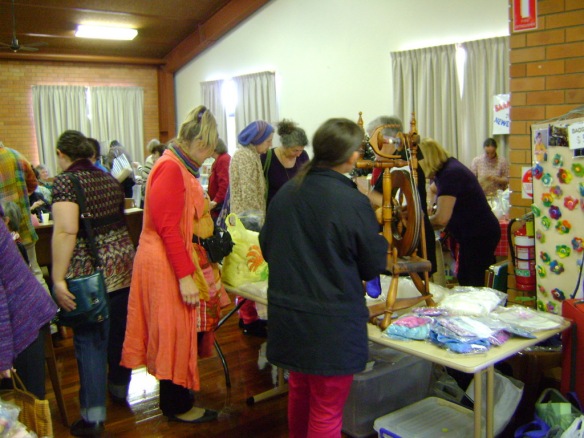
Now I’ve been a bit selfish in this post so far and just showed you everything I bought! Just prove there were other people at the Open Day here are some random shots of some of the visitors. There were even spinning wheels for sale but I resisted the temptation!

RSW Crowd 01

RSW Crowd 02

RSW Crowd 03

Desley’s stall with all her machine embroidered delights.

Desley 01

Desley 02

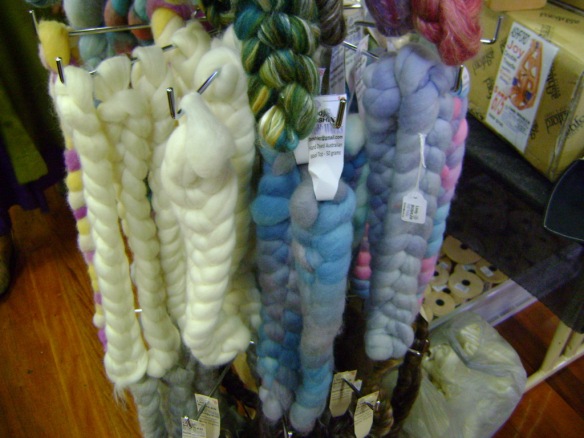
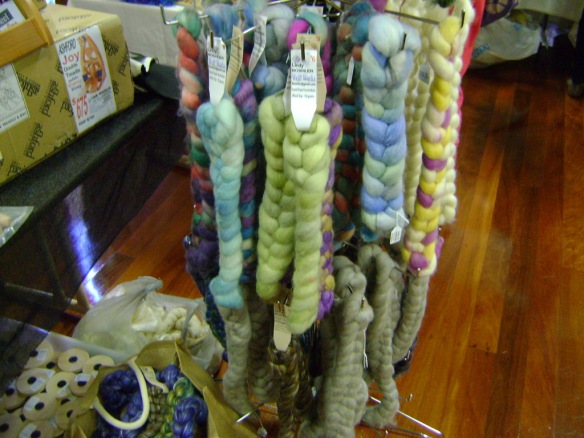
And lots of fibre / yarnie goodness on Lindy’s stall. Pity I couldn’t buy more!

Fibre Goodness 01

Fibre Goodness 02

Fibre Goodness 03

Fibre Goodness 04

All in all an exceptionally enjoyable day was had by all. I am quite exhausted and all I did was shop, eat and talk! I have so much spinning stash now to match my yarn stash. Just as well I’ve started selling off my massive collection of aromatherapy books on Ebay. I need to fund my new obsession.

Until next year’s Open Day…..I can’t wait!

Melanie

Two Easy Peasy Knitted Vests

When I got back into knitting nearly two years ago one of my aims was to knit a stack of vests for winter. Here in Brisbane it doesn’t get too cold in winter so vests are ideal as they keep your chest and back warm so you only really need a long sleeved shirt underneath. Perfect for workwear in the office.

I started off with good intentions and actually made a traditional vest – front, back, pick up stitches around the neck….you know what I mean.

And then in July last year I started another one. I’ve finished the back and am about a third of the way through the front. Using size 4mm needles and 8ply (DK) yarn just seems to take forever!!!

So it was with great excitement that I found the Keep Me Warm Vest on Ravelry. It’s knit in the round and doesn’t have any of that pick up stitches around the neck. Hooray!!

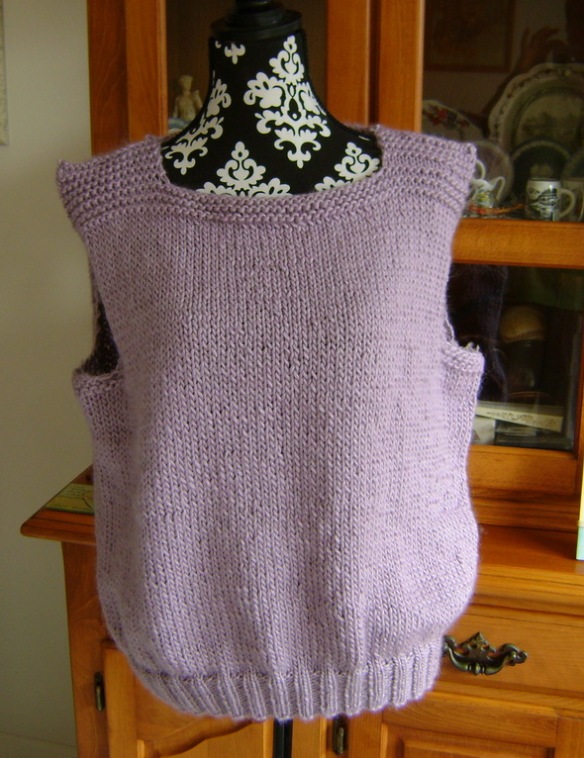
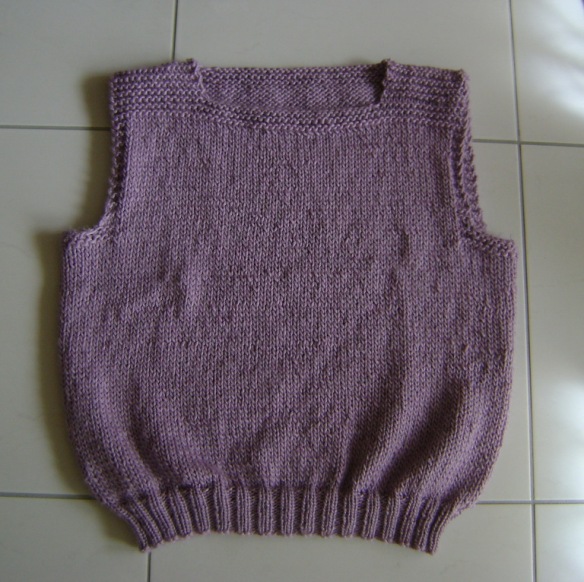
This is my first attempt….my Keep Me Warm Vest in mauve.

Vest Mauve 01

Vest Mauve 02

I’ve already worn it to work a couple of times and it’s kept me as snug as a bug in a rug! The yarn I used was bought on Ebay ages ago. It’s Moda Vera Mousse and it’s a 12ply (bulky) 70% wool / 30% soy blend. I used 4.5mm for the band and 8mm needles for the body of the vest. I was a bit worried the 4.5mm was too small and that I was going to have trouble getting it over my head but it worked out quite well as there is a bit of stretch in the band but not enough to make it saggy. I used seven balls of yarn.

Moda Vera Mousse

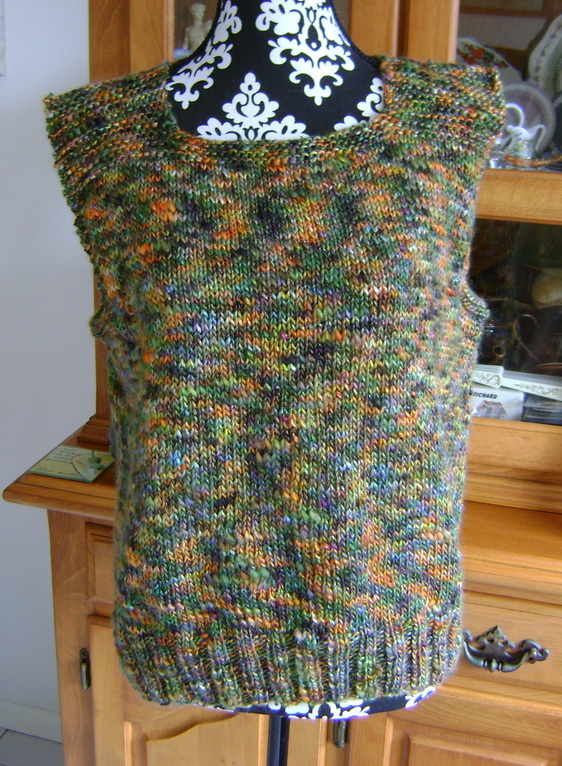
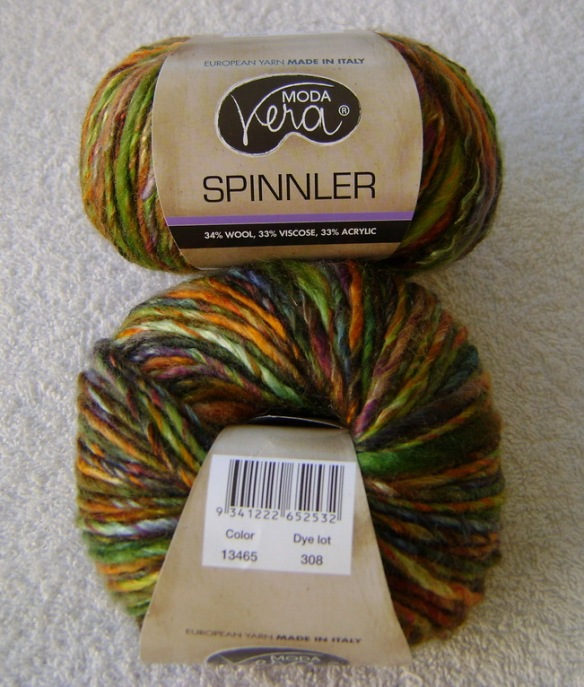
My second Keep Me Warm Vest is called Autumn as it’s knitted in Moda Vera Spinnler which is a 12ply (bulky) 34% wool / 33% rayon / 33% acrylic blend. I used seven balls of this yarn. I absolutely fell in love with this yarn when I saw the colour.

Vest Autumn 01

Vest Autumn 03

All those lovely autumn shades. I featured this yarn in a previous post.

Moda Vera Spinnler 01

Despite the fact both these yarns are listed as 12ply (bulky) the Spinnler didn’t seem as thick so I used 6mm for the band and 7mm needles for the body of the vest and cast on 150 stitches rather than 140 stitches. I have a phobia about my vests being too tight and showing every bulge so I’d rather they were a smidge loose so I have freedom of movement. And you know how much I hate knitting tension squares. So far both these vests fit perfectly. They’re not supposed to be a dense knit either.

I am nearly finished my third vest which is knitted in an 8ply (DK) yarn but I have used size 6mm needles so the vest grows faster than when using the traditional 4mm needles. All I can say is I’d much rather spend about a week knitting a vest (which is how long it’s taken me…and that’s only knitting at night time) rather than over a year knitting a ‘properly constructed’ vest.

You can easily add some cabling into the front of the vest as well to jazz it up a bit. I may try that when I knit my next one in a solid colour.

I am so thankful I found the Keep Me Warm Vest pattern. Let me know if you decide to knit one of these vests too.

Until next time…

Melanie

Pucker Socks……….Pair # 27

What an odd name for a sock pattern you’re probably thinking but once you see how the pattern actually makes the socks ‘pucker’ you’ll understand immediately why the pattern maker called them Pucker socks, as I did.

The pattern is eight pages in length with very detailed instructions I might add. The reason I picked this pattern is because when I was showing you some of my latest yarn purchases in March this year, one of the yarns I featured was Skein’s Top Draw Sock yarn in the colourway called Speakeasy and Julie from Dyed by Hand Yarns recommended the Pucker sock pattern would be a great pattern for that yarn and she was right. I am very happy with the result.

Pucker Socks 01

The patterning looks completely different from the picture on the pattern and that’s because I’ve used a single hand dyed yarn and the pattern recommends two different yarns. I cast on 72 stitches and used 2.75mm dpns. I was a bit worried the socks would be too tight as the writer states that since mosaic fabric has a much reduced ability to stretch,  you should move up one size from what you would choose for a plain sock. I would generally use 64 stitches for a plain sock so that’s why I cast on 72 stitches plus I also went up a size in needle from 2.5mm to 2.75mm. The socks fit perfectly!

The heel consists on one row sl1, k1 repeated across the row followed by a purl row. It looks great with this yarn.

Pucker Socks 03

Pucker Socks 16

Pucker Socks 18

Pucker Socks 07

As mentioned previously, I used Skein’s Top Draw sock yarn which is a 85% merino / 15% nylon blend that comes in 100g skeins. I only used 73 g so will probably use the rest on a project I have in mind for all my sock yarn leftovers and that is Frankie Brown’s Button Quilt. I haven’t started it yet but at this stage that is what the plan is. This is a free Ravelry knitting pattern and it looks pretty cool!

Skein Speakeasy

Here’s a picture of the Button Quilt from the Ravelry page. It looks great doesn’t it?

Button Quilt

And here’s what the socks look like when they’re off your foot. They’re all puckered….a bit like seersucker fabric.

Pucker Socks 14

Pucker Socks 13

I hope you have fun making these very unusual socks. Well I’d best be off to work. Have a fantastic weekend. Until next time….

Melanie

A Beautiful Bought Crocheted Blanket

I couldn’t resist this blanket when I saw it at a charity stall while walking to work one Friday morning.

Crocheted Blanket 01

Although they’re not my favourite colours I was quite taken with the crocheted pattern of the blanket….and also the price which was only $10!!!!!!!!!!

Crocheted Blanket 02

It’s quite beautiful isn’t it?

Crocheted Blanket 03

Crocheted Blanket 04

I would love it if someone could identify what this pattern is as I am quite intrigued. It looks like multiples of treble crocheted horizontally and vertically.

Crocheted Blanket 05

Crocheted Blanket 06

I guess if I really tried I could work out the pattern but I’m more of a knitter than a crocheter.

Crocheted Blanket 07

I would imagine many hours of work went into this blanket. I’m certainly familiar with that after crocheting my Starburst Flower Blanket.

Hope you all had a lovely weekend. Here in Brissie it’s a long weekend so it’s another sleep in tomorrow for me. Hooray! I had a lovely day today catching up with two friends I’ve known since 1972. Lots of talking, eating and drinking wine and coffee.

Until next time…

Melanie

A Spinning Wheel Package

Last week one of my friends contacted me to let me know of a spinning wheel and accessories that were being sold by someone she worked with. She sent me a picture of the items. As you can see everything is quite dusty and neglected. The total cost for the bundle was AU$50 which was a bargain as I was particularly interested in the spinning chair.

The following photos will show you before and after pictures once everything had been thoroughly cleaned with four coatings of a 50%/50% blend of boiled linseed oil / pure gum turps. It was certainly a labour of love as it took ages to get the wheel to its current gorgeous condition. That bobbin standing upright on the lazy kate looks like it’s been chewed by a dog!

spinning wheel

What an amazing transformation don’t you think? Oh and BTW that long thing on the left is called a squirrel cage swift and it’s used as a yarn winder. I had no idea but someone from the Ravelry Australian Spinning Wheels Group told me as I posted pictures of the wheel as I was trying to identify the maker.

Bundle 01

Mystery Wheel 01

The treadle certainly looks like it’s had a hard life but the linseed oil/gum turps gave it a bit of a lift.

Mystery Wheel 05

Crank 01

It’s hard to believe it’s the same spinning wheel. The wood is now gleaming! I cannot believe how parched the wood was. The first coat of oil/turps soaked in so quickly.

Crank 03

Flyer 02

Ironically, the hooks hadn’t rusted at all so I didn’t have to replace them.

Flyer 08

Look at those grungy old bobbins and lazy kate…

Lazy Kate 01

and look at these sparkling clean bobbins and lazy kate!

Lazy Kate 07

Chair 04

I love this spinning chair. Just need to find a nice comfy cushion for her.

Chair 09

The spinning wheel is extremely solid and quite heavy and I’m having a devil of a time trying to treadle and get the footman to turn the wheel so I have decided to sell the wheel and lazy kate on Ebay and keep the chair (which is really what took my fancy). All it needs is someone with some handyman expertise to get it going. I already have five spinning wheels and this one is taking up a bit of room.

Here’s some more pictures of squirrel cage swifts with a ball winders on top just to give you an idea of how they work.

squirrel cage swift

squirrel cage swift 2

Fingers crossed I can sell the spinning wheel on Ebay. A few more photos to finish off…

Flyer 07

Flyer 09

Tension Knob 04

Mystery Wheel 06

Until next time…

Melanie

A Stunning Ashford Traveller Spinning Wheel

Most of my friends know how much I hate driving. I think I’d rather do some housework than drive; that’s how much I hate it. Which leads me to my recent driving feat this  week of over 100 kilometres in round trips to pick up two spinning wheels. Now that’s an obsession isn’t it? The first trip was to pick up a wheel and chair from Logan Village which I’ll blog about in a future post when the wheel is cleaned up. The spinning wheel I am going to show you today is the most stunning wheel I’ve seen and certainly the most cared for wheel I have bought. I picked her up from The Gap yesterday. The previous owner is to be commended on her fastidious love and care of this wheel. All I had to do was give her a quick rub with a dusting cloth and voila she was perfect. There is not even a skerrick of rust on any of her metal parts either.
It also happens to be my sixth working wheel. What?? I can hear you all screaming out! Yes, I now have six spinning wheels and living in a townhouse has called for some ingenious furniture placement I might add! The biggest decision I have is to decide which one to use!

This is my latest addition…..the stunningly beautiful Ashford Traveller.

Ashford Traveller 01

Isn’t she beautiful and doesn’t she gleam?

Ashford Traveller 02

I love her colour too….it’s sort of a rosewood/claret or maybe someone out there will know the correct colour finish.

Ashford Traveller 03

Ashford Traveller 04

Ashford Traveller 05

Ashford Traveller 07

Ashford Traveller 08

I love the built in lazy kate…

Ashford Traveller 10

She even came with a niddy noddy…

Niddy Noddy 01

And I am assuming this is the name of the previous owner that is carved into the niddy noddy…

Niddy Noddy 02

To me, one of the signs of really caring for something is keeping all the original bits and pieces and paperwork. Well the former owner of this wheel certainly did that. I also received a copy of the assembly instructions…

Instructions Page 1

Instructions Page2

Plus an Ashford book about spinning…

Ashford Book

Plus a couple of Ashford leaflets…

Ashford Leaflet

Ashford Leaflet 02

And of course, the threading hook which invariably always gets lost but not in this case!

Threading Hook

I absolutely love this little wheel and I am going to care for her just as much as her previous owner did.

And to finish, here’s a picture of her with two of her sisters…Little Peggy and Wee Peggy. Don’t they look spectacular lined up together?

Peggies and Traveller

Next week I’ll show you all the pictures of the other spinning wheel I bought and am currently cleaning up. Plus there were some accessories but I will leave you in suspense until my next post. This is a mystery wheel as to date I do not know the manufacturer but have posted a couple of discussions on some spinning wheel group sites and am hoping to find out more about this wheel. Will let you know what eventuates.

Until next time…

Melanie